Easy No-Bake Witch Finger Pretzels: Your 20-Minute Halloween Treat
The air is crisp, the leaves are turning, and a whisper of something spooky is in the wind – it can only mean one thing: Halloween is almost here! If you’re anything like us, you love the thrill of the season but might feel a slight dread about the endless costume planning, decorating, and, of course, the treat-making. Fear not, fellow Halloween enthusiasts! We’ve unearthed a bewitching secret that combines maximum spooky impact with minimal effort: the glorious, grotesque, and utterly delicious no-bake witch finger pretzels. Forget complicated recipes that tie you to the oven; these creepy-crawly delights are ready in about 20 minutes, making them the ultimate last-minute Halloween hero. Imagine serving up a platter of these gnarled, green digits, complete with ghastly black fingernails and optional gory "blood" – your guests will shriek with delight before devouring every last one. They’re a guaranteed hit at any monster mash, a fantastic after-school surprise for the kids, and an incredibly fun project for all ages. So, grab your apron (or just a healthy dose of Halloween spirit), because transforming simple pretzel rods into frightfully fun witch finger pretzels is easier than casting a spell.Why You’ll Love Crafting These Ghoulishly Good Witch Finger Pretzels
In the whirlwind of Halloween preparations, finding a treat that’s both impressive and stress-free feels like discovering a hidden potion. These witch finger pretzels are precisely that secret weapon. Here’s why they’ll become your go-to every spooky season:- No-Bake Brilliance: The biggest draw? No oven required! This translates to more time for carving pumpkins, perfecting costumes, or simply relaxing. Just melt, dip, and decorate. It's perfect for those moments when time is short, but the desire for spooky snacks is strong.
- Kid-Approved Creepiness: Children are naturally drawn to anything a little bit gross, and these pretzels deliver on the "eww!" factor in the best possible way. The visual appeal of these gnarled fingers ignites their imagination, and they absolutely love helping. Coating pretzels, pressing on the almond "nails," and even designing the "knuckles" provides a fantastic sensory and creative activity. It’s a wonderful way to involve little hands in the Halloween fun, fostering creativity and a love for homemade treats. For more fantastic ideas that engage young ones, check out our guide on Kid-Friendly Spooky Fun: Make Creepy Witch Finger Pretzels for Halloween.
- Party Perfection: Hosting a Halloween bash? These witch finger pretzels are destined to be the star attraction. They're not only incredibly eye-catching but also perfectly portioned and easy to grab. Pile them high on a serving tray, perhaps nestled amongst some dry ice for an extra smoky, cauldron-like effect, and watch them disappear faster than a ghost in the night. They're always the first treat to vanish at our gatherings. For more stellar snack ideas that will elevate your Halloween party, explore The Ultimate Halloween Party Snack: Simple Witch Finger Pretzels Recipe.
- Foolproof Fun: Don't fret if your candy coating isn't perfectly smooth or if the knuckles look a bit lumpy. In fact, imperfections only add to the deliciously gross charm of these witch fingers! Their inherently gnarled appearance means there's no way to mess them up; every "wrinkle" or "crease" just makes them look more authentic.
Gathering Your Supplies for Spooky Success
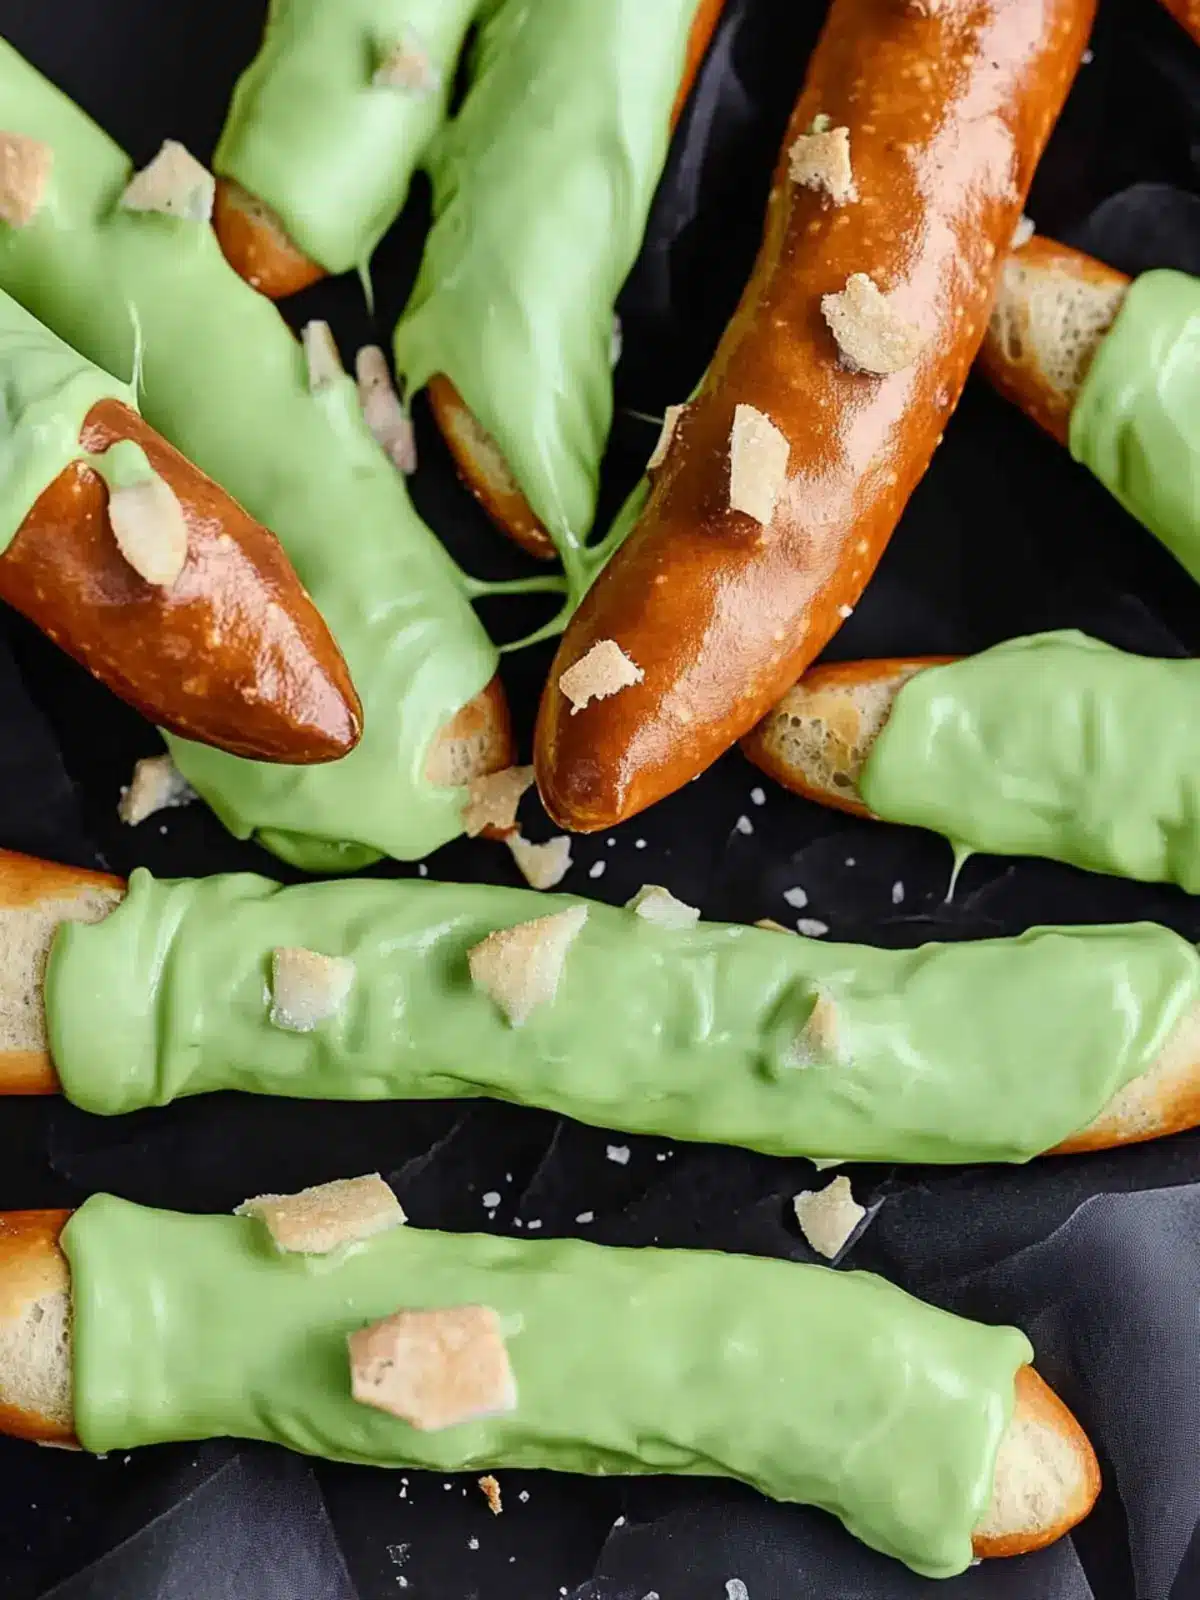
Creating these magnificent witch finger pretzels requires only a handful of readily available ingredients. Precision, especially when working with candy melts, can make all the difference between a smooth, spooky finish and a sticky, frustrating mess. Trust us, learning the hard way about seized candy melts is not the kind of Halloween fright you want! Here’s what you’ll need to conjure up your batch of ghoulish goodies:- 12 Large Pretzel Rods (about 7-8 inches long): These sturdy rods form the "bones" of your witch fingers. Their length provides ample surface for dipping and decorating.
- 6 ounces (170g) Green Candy Melts: This will be the "skin" of your witch fingers. Look for vibrant shades like "slime green" or "monster green" to achieve that perfect sickly, magical hue.
- 2 ounces (57g) Black Candy Melts: Essential for crafting those sinister, creepy fingernails. The dark contrast against the green makes them truly pop.
- 12 Slivered Almonds: These are your witch's "fingernails." Take a moment to sift through the bag and select the most pointed, wicked-looking slivers you can find for maximum effect.
- Optional: Red Gel Food Coloring Pen or Red Icing Gel: For an extra touch of gore, a thin line of red around the cuticle of the almond nail creates a horrifying "freshly plucked" effect. This simple addition elevates the creepiness factor significantly!
- Parchment Paper or Silicone Baking Mats: Crucial for a non-stick surface to lay your dipped pretzels and almond nails, ensuring easy removal once hardened.
Step-by-Step Guide: Conjuring Your Witch Finger Pretzels
Now that you have all your ingredients, let's get down to the truly fun part – assembling your spooky snacks! These witch finger pretzels come together faster than you can say "double double toil and trouble."1. Preparing the Sinister Fingernails
First, we'll tackle those crucial creepy fingernails. Melt your black candy melts in a microwave-safe bowl. Heat in short 20-second bursts, stirring vigorously between each round, until the candy is smooth and completely melted. Be careful not to overheat, as this can cause the candy to seize.
Once melted, grab your slivered almonds. Here’s a clever trick: use tweezers or a toothpick to carefully dip each almond completely into the black candy. Ensure full coverage for a uniform, eerie nail. Once dipped, gently lay each almond on a sheet of parchment paper or a silicone mat. Allow them to harden completely, which typically takes about 15-20 minutes. Don’t rush this step; properly set nails prevent smudging later!
2. Transforming Pretzels into Bony Digits
Next up, it’s time to give those pretzel rods their ghastly green skin. In a separate microwave-safe bowl, melt your green candy melts following the same short-burst, stir-and-heat method as with the black melts. You want a smooth, flowing consistency, but not too thin.
Hold a pretzel rod by one end and dip it into the melted green candy, rotating to coat about two-thirds of the rod. Gently tap the rod against the side of the bowl to allow any excess candy to drip off. You want a good, even coating without too much build-up.
While the green candy is still wet and pliable on the pretzel, it's time to create those signature witchy knuckles. Using the back of a spoon, a butter knife, or even your clean fingers, gently indent and crinkle the candy coating in two or three places along the dipped portion of the pretzel. These indentations will give your fingers their gnarled, jointed appearance – remember, the uglier, the better!
3. Attaching the Horrific Details
Immediately after shaping the knuckles, carefully press one of your hardened black-dipped almond nails onto the very tip of the green-coated pretzel. Press gently but firmly enough that the almond adheres securely to the still-soft candy coating. The melting green candy will act as an adhesive, securing the nail in place.
Once the almond is attached and the knuckles are formed, carefully place the finished witch finger pretzel onto your parchment paper to set. Repeat this process for all remaining pretzel rods. Allow them to harden completely at room temperature or, if you're in a hurry, pop them into the refrigerator for 5-10 minutes.
4. Adding the Gruesome Finishing Touches (Optional but Recommended)
For that extra gruesome touch, once your witch finger pretzels are fully set and hardened, grab your red gel food coloring pen or red icing gel. Carefully draw a thin, jagged line around the base of the almond "fingernail," mimicking a freshly torn cuticle or a touch of blood. This small detail truly elevates the creepiness and adds a realistic, macabre flair that will make your treats unforgettable.
Expert Tips for Mastering Your No-Bake Halloween Magic
While these witch finger pretzels are delightfully simple, a few expert tips can elevate your spooky creations from great to absolutely ghastly masterpieces.- Perfecting Candy Melt Consistency: The key to smooth dipping is perfectly melted candy. If your candy melts seem too thick, you can add a tiny bit (about 1/2 teaspoon at a time) of coconut oil or vegetable shortening and stir until smooth. This thins the candy slightly, making it easier to achieve an even coat. Conversely, if your candy melts seize (become grainy or clumpy), it usually means they were overheated or came into contact with water. Unfortunately, once seized, it’s often best to start with a fresh batch.
- Achieving Realistic Knuckles: Don't be afraid to get a little messy here! While the green candy is wet, you can slightly bend the pretzel rod to emphasize the "joint" as you create the indentations. For extra texture, use a toothpick to create small lines or "wrinkles" around the knuckles before the candy sets. Remember, witch fingers are rarely smooth and perfect!
- Creative Nail Variations: While black is classic, consider other gruesome nail colors! Dark purple or even a mottled brown can add variety. You could also try painting the underside of clear almonds with a tiny black dot for a "dirty nail" effect, or skip the black melts entirely and attach the plain slivered almond, adding the red gel for a truly "freshly ripped" look.
- Storage and Presentation: Store your finished witch finger pretzels in an airtight container at room temperature for up to a week. For serving, arrange them artistically on a platter. Consider a bed of dark "dirt" (crumbled Oreos), a "spiderweb" (pulled cotton candy), or emanating from a "cauldron" with dry ice for dramatic effect.
- Allergy-Friendly Alternatives: If you're catering to nut allergies, fear not! Small pumpkin seeds, sunflower seeds, or even a flattened chocolate chip can serve as effective "nails." Just ensure they are pressed firmly into the still-wet candy coating.
- Scaling Up or Down: This recipe is incredibly adaptable. For a smaller family treat, simply halve the ingredients. For a grand Halloween party, double or triple the recipe with ease. Just ensure you have enough parchment paper and workspace!
