Halloween is synonymous with spooky fun, creative costumes, and, of course, an abundance of delicious treats. But for many hosts, the idea of spending hours in the kitchen after meticulously decorating the house and assembling costumes can be daunting. Enter the ultimate Halloween party snack: witch finger pretzels. These delightfully eerie concoctions are not only a feast for the eyes but also incredibly simple to create, proving that Halloween baking can be both spectacularly spooky and surprisingly stress-free.
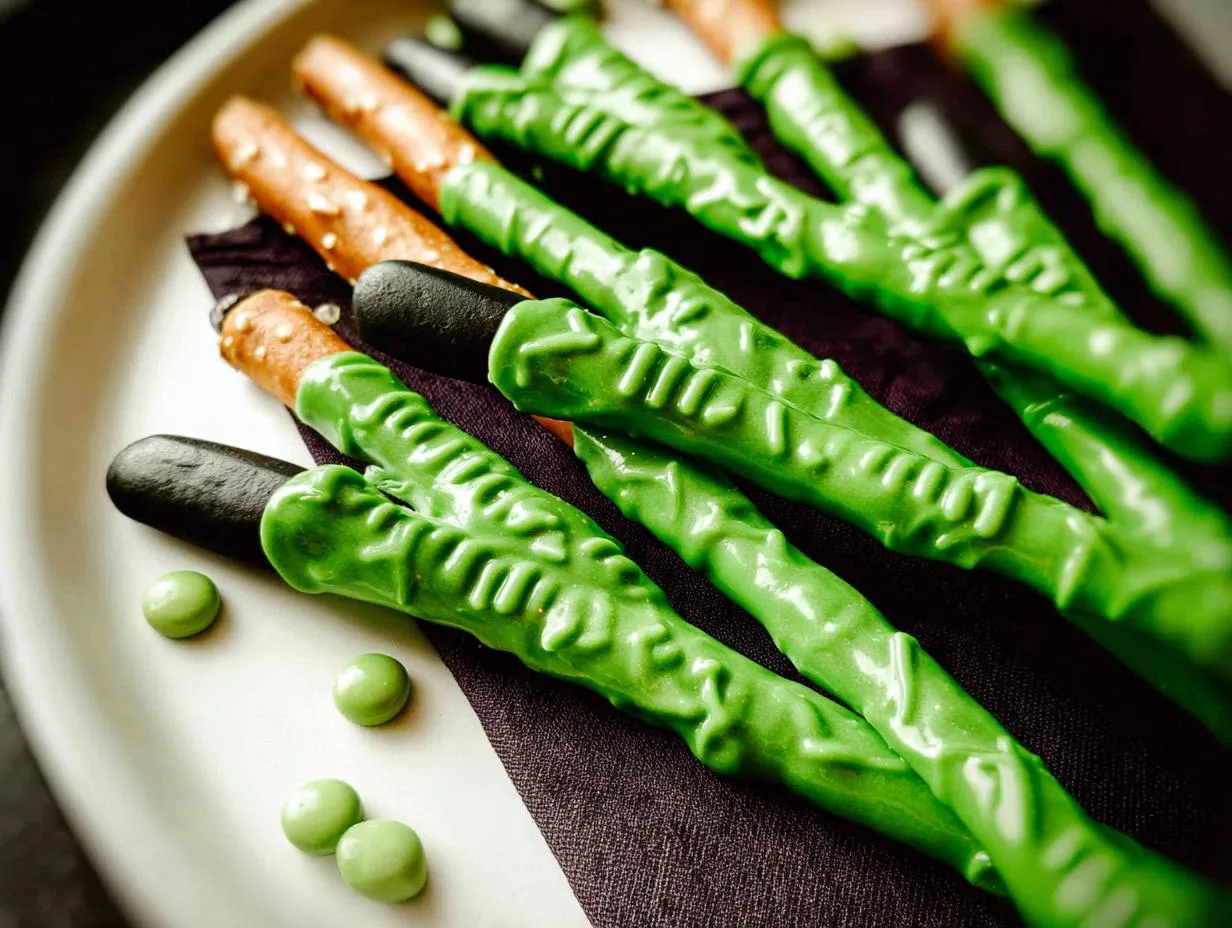
Imagine long, gnarled green fingers, complete with gruesome black fingernails, laid out on a platter. They look like they've just emerged from a bubbling cauldron, ready to snatch up unsuspecting partygoers. Yet, beneath their creepy exterior lies the familiar crunch of a pretzel rod, coated in sweet candy melts. My own kids, usually sugar-crazed critics, were completely obsessed when we first made these for their class party last year. They vanished faster than a ghost in a haunted house, prompting requests for them every Halloween since. The best part? There’s no oven required, making them a perfect last-minute addition to any monster mash or a fun, interactive project for the whole family.
Why Witch Finger Pretzels Are a Halloween Must-Have
Halloween prep can quickly become a balancing act between costume creation, house decorations, and the inevitable sugar rush. These witch finger pretzels are your secret weapon, simplifying the snack situation without sacrificing any of the festive spirit. Here’s why they’ll be the star of your spooky spread:
- No-Bake Magic: Forget preheating ovens or elaborate cooling processes. This recipe is pure no-bake bliss. You simply melt, dip, and decorate. This makes them Easy No-Bake Witch Finger Pretzels: Your 20-Minute Halloween Treat, perfect for when you're short on time but still want to deliver on the Halloween theme.
- Kid-Approved Creepy: Children absolutely adore the "eww!" factor these treats bring. The grotesque appearance sparks their imagination, making them even more excited to gobble them up. Plus, they’re incredibly Kid-Friendly Spooky Fun: Make Creepy Witch Finger Pretzels for Halloween! Younger kids can help by pressing on the "almond nails" or arranging them on the drying rack, making it a truly collaborative holiday activity.
- Party Superstar: At every Halloween bash, these witch finger pretzels are always the first to disappear. Their unique look makes them an instant conversation starter. For extra drama, consider piling them on a tray with some dry ice (used safely, of course) for a truly theatrical presentation that will have guests gasping before they reach for a bite.
- Foolproof Fun: Don't fret if your candy coating isn't perfectly smooth. In fact, imperfections only add to the charm of these witchy digits! Wrinkles, bumps, and slightly uneven coating simply make them look more authentically gnarled and "freshly plucked" from a magical forest. It’s a recipe where mistakes often look intentional and delightfully gross.
- Budget-Friendly Brilliance: With just a few basic ingredients, these treats are incredibly economical. You can make a large batch for a crowd without breaking the bank, making them ideal for school parties, neighborhood gatherings, or just a fun family movie night.
Gathering Your Ghoulish Goodies: Ingredients for Perfect Witch Finger Pretzels
The beauty of these witch finger pretzels lies in their simplicity. You only need a handful of ingredients, most of which might already be lurking in your pantry. However, a little precision, especially when it comes to the candy melts, can make all the difference for a smooth, spooky finish. Trust me, I've had my share of sticky situations from eyeballing measurements!
Essential Ingredients:
- 2 ounces (57g) Black Candy Melts: These will form the ominous fingernails. Ensure they are fresh for smooth melting.
- 12 Slivered Almonds: Look for the pointiest, most irregular slivered almonds you can find – they lend themselves perfectly to the gnarled witch aesthetic. If allergies are a concern, consider using green pumpkin seeds, chocolate chips, or even small pieces of dried fruit for an alternative "nail."
- 12 Large Pretzel Rods (about 7 to 8 inches long): These are the "bones" of our witch fingers. Opt for sturdy rods that won't easily break when dipped.
- 6 ounces (170g) Green Candy Melts: This will create the sickly, witchy skin tone. You can find various shades of green, from lime to forest green, allowing you to customize your witchy aesthetic. If you can only find white candy melts, a few drops of oil-based green food coloring can transform them into the perfect hue.
- Optional: Red decorating gel or icing: For that extra gruesome touch, mimicking "blood" around the fingernails.
Helpful Tools:
- Microwave-safe bowls
- Parchment paper or wax paper
- Baking sheet (to hold the parchment paper)
- Spoon or rubber spatula for stirring and drizzling
- Tweezers or toothpicks (for handling almonds)
That’s it! With these simple provisions, you're ready to transform ordinary ingredients into something gloriously gross and utterly irresistible.
Conjuring Creepy Confections: Step-by-Step Guide to Making Witch Finger Pretzels
Let's get spooky! These witch finger pretzels come together faster than you can say "double, double toil and trouble." Follow these straightforward steps, and you'll have a batch of ghoulish goodies ready to haunt your snack table in no time.
1. Preparing the Almond Nails
- Melt the Black Candy Melts: Place your black candy melts in a small, microwave-safe bowl. Heat in 20-second bursts, stirring thoroughly after each interval, until the candy is smooth and fully melted. Be patient and avoid overheating, which can cause the candy to seize or burn. If you don't have a microwave, a double boiler works beautifully for controlled melting.
- Dip the Almonds: This is where tweezers or toothpicks become your best friends. Carefully pick up each slivered almond and dip it completely into the melted black candy. Ensure it's fully coated.
- Harden the Nails: Place the dipped almonds on a sheet of parchment paper or wax paper. Allow them to harden completely, which usually takes about 15-20 minutes at room temperature. You can also pop them into the refrigerator for 5-10 minutes to speed up the process. Resist the urge to rush this step – perfectly set nails are key!
2. Dipping the Pretzel Rods
- Melt the Green Candy Melts: In a separate, larger microwave-safe bowl (one deep enough for dipping pretzel rods), melt your green candy melts using the same 20-second burst method as with the black melts. Stir until perfectly smooth and creamy. If the candy seems too thick, add a tiny bit of shortening (like Crisco) or a few drops of neutral oil (like vegetable oil) and stir until it reaches a dippable consistency.
- Dip the Pretzel Rods: Hold a pretzel rod by one end (this will be your "handle"). Dip the other end into the melted green candy, coating about two-thirds to three-quarters of the rod. Gently twist and tap off any excess candy.
- Create the "Knuckles": While the green candy is still wet, gently wiggle the pretzel rod back and forth over the bowl or use a spoon to create small ridges and bumps, mimicking the look of gnarled knuckles. Don't worry about perfection; unevenness adds to the witchy charm!
- Attach the Fingernail: Immediately, before the green candy sets, pick up one of your hardened black almond "fingernails" and gently press it onto the tip of the dipped pretzel rod. Hold it in place for a few seconds to ensure it adheres.
- Harden the Fingers: Lay the finished witch finger pretzels onto a fresh sheet of parchment paper. Allow them to set completely, which can take up to 30-60 minutes at room temperature, or accelerate the process by refrigerating them for 15-20 minutes.
3. (Optional) Adding the Bloody Detail
Once your witch finger pretzels are completely hardened, you can add an extra touch of gore. Use a red decorating gel or icing to dab a small amount around the base of each black almond fingernail, creating a "freshly plucked" or "bloody" effect. This simple addition elevates the creepiness factor significantly!
Tips for a Spellbinding Snack Experience
To ensure your witch finger pretzels are a bewitching success, here are some extra tips and tricks:
- Candy Melt Consistency: If your candy melts are too thick for dipping, stir in a teaspoon of paramount crystals, vegetable shortening, or coconut oil (not water!) until you reach the desired consistency. If they become too thin, add more candy melts.
- Working in Batches: If you're making a large quantity, melt smaller batches of candy melts to prevent them from hardening in the bowl while you're working. You can also keep the bowl of melted candy melts over a pot of simmering water (creating a makeshift double boiler) to keep it warm and liquid.
- Creative Color Variations: Don't feel limited to green! Experiment with purple for a mysterious witch, orange for a pumpkin witch, or even white for ghostly fingers. Different colored candy melts open up a world of monster possibilities!
- Storage: Once completely hardened, store your witch finger pretzels in an airtight container at room temperature for up to one week. Avoid refrigeration if possible, as it can sometimes cause the candy coating to "sweat" or become dull.
- Kid Safety: While it’s a great Kid-Friendly Spooky Fun: Make Creepy Witch Finger Pretzels for Halloween activity, supervise younger children, especially when working with melted candy. Adults should handle the melting process and hot bowls.
- Presentation Matters: Arrange your finished fingers creatively. A black platter, a bed of cotton candy "spiderwebs," or even a large, clean bowl with plastic spiders scattered around can enhance the eerie aesthetic.
- Nut-Free Alternatives: For guests with nut allergies, use chocolate chips, green pumpkin seeds, or even small pieces of dried mango cut into a nail shape instead of slivered almonds. You can also paint edible "nails" directly onto the pretzel with black candy melts.
These simple additions and considerations can elevate your witch finger pretzels from a fun treat to a truly unforgettable Halloween experience.
With their captivatingly creepy appearance and utterly irresistible crunch, witch finger pretzels are the quintessential Halloween party snack. They deliver all the spooky charm without any of the culinary stress, making them a perfect project for bakers of all skill levels – even those who usually shy away from the kitchen. Whether you're hosting a grand ghoulish gathering or just looking for a fun activity to celebrate the season with your family, these easy, no-bake treats are guaranteed to be a monstrous hit. So gather your ingredients, unleash your inner witch, and prepare to conjure up a batch of these gloriously grotesque delights!
